Using Zoom on Camino
Zoom sessions can be initiated from within Camino.
This will automatically invite any user enrolled in your Camino class to attend the video conference, and you can choose to automatically record the session for students to view afterwards. This is recommended for recording class sessions or large group discussions.
For more information on private 1-on-1 or office hours zoom sessions, please check out the Recommended Zoom Meeting Settings.
Add the Zoom Pro tab to your Camino Course
1. Click on Settings on your course navigation bar for the course to which you want to add the link.
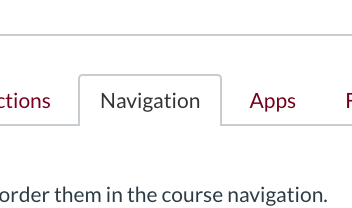
2. Click on Navigation
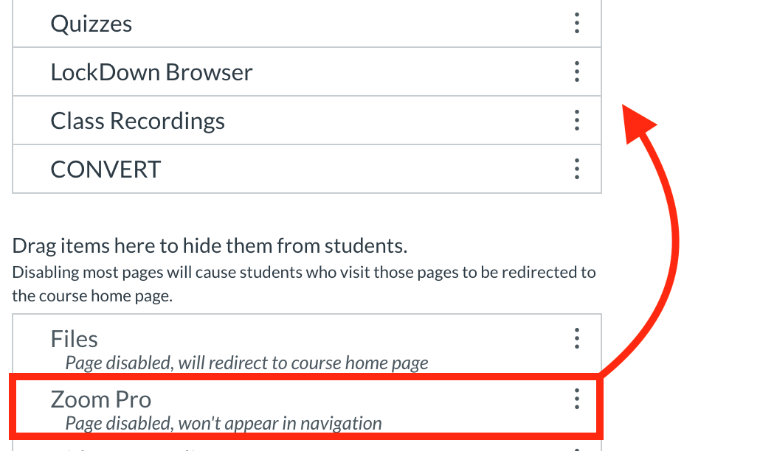
3. Click and hold on Zoom Pro and drag it to the top.
4. Don’t forget to click Save at the bottom of the screen.
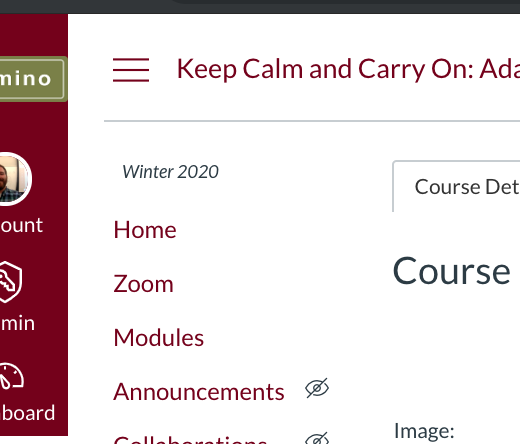
5. Once the Zoom link has been added to your course navigation bar, click on it to start the setup process.
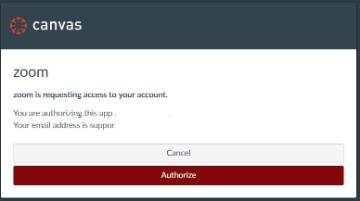
6. If this is your first time using the Zoom Pro tab feature, you may need to authorize the link between Zoom & Camino (Canvas).
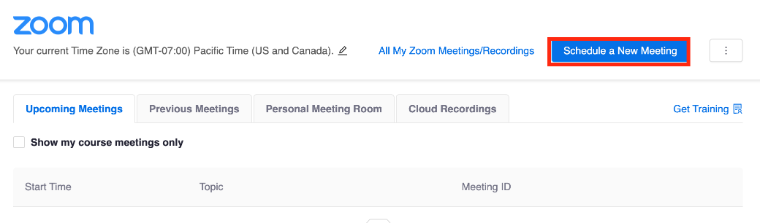
Now you are ready to schedule a new meeting.
Checkout the options below for recommended meeting settings.
Recommended Recurring Meeting Settings
We recommend using the Zoom Pro tab within your Camino course site to schedule recurring class meetings. This is the easiest way to share Zoom meeting information with your students, and to share class recordings with your students automatically.
TOPIC
Topic section is prefilled with course full name.
We recommend you add the following information if you combine multiple sections into the same Camino course, but still want to keep the meetings separate per section.
- Section # or 5 digit Course ID #
- Class start time
DESCRIPTION
Description field is optional and students do not see this section. Feel free to skip this section.

WHEN
Input your first day of class. The time field defaults to 15-minute increments, but you can change it by clicking on the field and typing in the desired start time in the HH:MM format. Make sure to double-check AM/PM.
Zoom will let you start the meeting even if it's not during the scheduled time.
DURATION
The duration field defaults to 15-minute increments. We recommended setting the time to the closest 30-minute mark.
Zoom will not cut you off if you run past the meeting duration time.
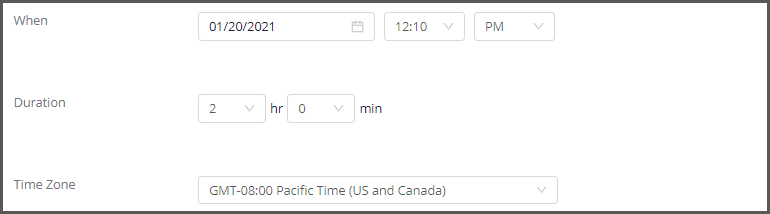
TIME ZONE
You should not have to change the default Pacific Time (US & Canada) time zone unless you (the meeting scheduler) are currently in a different time zone.
RECURRING MEETING
Check the Recurring checkbox to see the recurring options.
The most common setting is to set Recurrence to Weekly, Repeat every 1 week.
Check all the days you are meeting every week (we will cover how to remove holidays in the later section.)
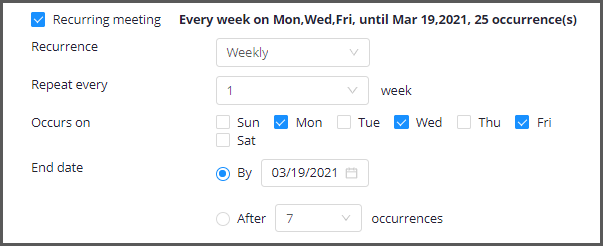
We recommend including the final exam week in your meeting schedule. You can delete it later if you don't need it.
REGISTRATION
Registration is designed for events that invite both internal and external attendees. Typical classes do not need this option.
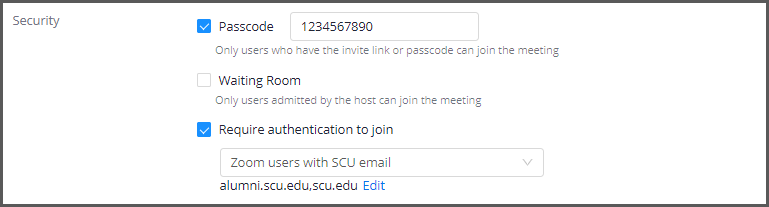
SECURITY
We strongly recommend you set security parameters to prevent possible Zoombombing.
Passcode can be customized with up to 10 letters, numbers, and special characters.
Waiting Room is a great option for 1:1 meetings or office hours. However, we do not recommend turning on this option for recurring meetings.
Require authentication to join - Zoom users with SCU email is recommended if you would like to track meeting attendance. If you expect a guest from outside of SCU community to join your class, you can change the settings to allow any Zoom user.
VIDEO
This dictates if you want the camera to show when you and the participants first log in to the meeting. You and the participants can always turn camera off at any time.
AUDIO
We recommend selecting Both Telephone & Computer audio so that if a student encounters audio issues with their computer, they can always choose to call in with their cell phone to participate in the meeting.

MEETING OPTIONS
Meeting options can vary depending on how you want to run your meeting. Below is the explanation of each option for turning on or off.
Students can join the meeting anytime of the day.
If this option is checked and you selected to record your meeting session automatically, you may see recordings appear every time someone joins a meeting even when class is not in session.
We recommend this option.
Students will see a "please wait for host to start the meeting" message, and will not be able to join the meeting until you start the meeting session.
![]()
We recommend this option.
Participants' microphone will be muted when they first join the meeting. They will have the option to unmute themselves once they are ready.
Participants' microphone may be unmuted upon joining the meeting. You may hear unnecessary background noises.
![]()
We recommend this option.
Recording will start automatically when someone joins the meeting. You can always pause or stop the recording at any time.
You have the option to start the recording at any time.
Note: We always recommend recording your session to the cloud. Zoom will keep your video recording on Zoom recording server for 30 days. We automatically make a copy of the recorded video to the Panopto video server, where it will remain available indefinitely.
By using the Zoom Pro feature, the copied video is posted to the Class Recordings folder in Camino automatically for you.
Start or Delete a Meeting
Start a Meeting
Once your meeting is scheduled, you will need to start the meeting when it is time to begin.
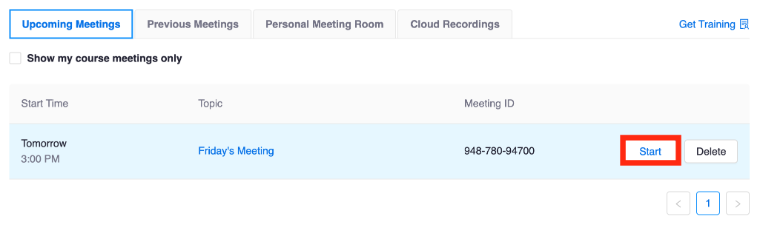
- Click on the Zoom link on your course navigation bar
- View the upcoming meeting
- Click Start to launch the meeting
This will launch your Zoom session.
Delete a Meeting
- Click the Delete button next to the meeting to be deleted
- Click OK in the pop-up dialog to confirm that the meeting is to be deleted.
Students will be notified when you delete a Zoom session. (Note: Only the meeting creator can delete a meeting that has been created using the Zoom for Canvas tool.)
Zoom Meeting Tips from Amy Eriksson (Communications Dept)
- The chat window is useful but sometimes hidden. I usually ask students questions out loud to engage them, but give them the option to answer in writing in the chat box if they don’t want to unmute themselves and talk.
- I suggest telling students ahead of time that their camera and audio may be on because it can be very awkward if they don’t realize everyone can see and hear them. Alternatively, consider selecting the option to mute participants upon entry when creating the meeting, then tell them they can choose to unmute themselves.
- Meetings will only appear for students in the Camino course in which you created the meeting, but they will appear for you in all your courses, which can be confusing. To get around this issue if you want multiple classes to attend the same Zoom session, copy the URL and send the link to the class in a Camino announcement.
- Don’t schedule private one-on-one Zoom meetings through Camino—everyone in the course can see them and log in. Use the Zoom feature from the main SCU login page instead. There's also a way to link with Google Calendar and send invites with the Zoom link embedded, which is very useful for private conferences with individual students.
- Screen sharing is useful for using slides but makes it hard for the instructor to see students and the chat window. You can rearrange the windows to make it easier, but it takes some trial and error.
Troubleshoot: Can't see the Zoom integration on Camino
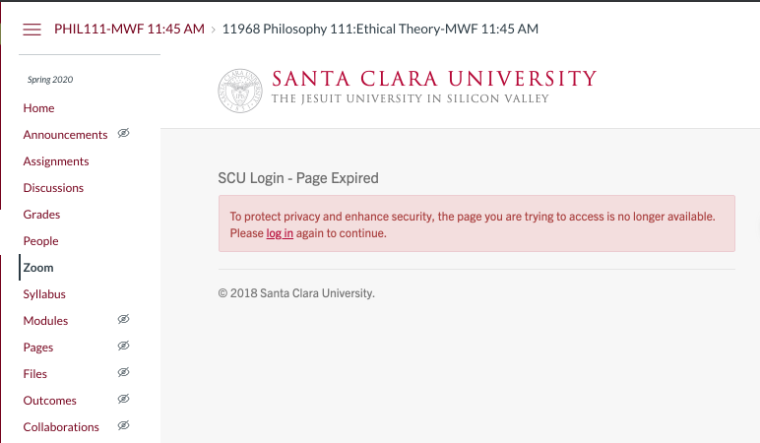
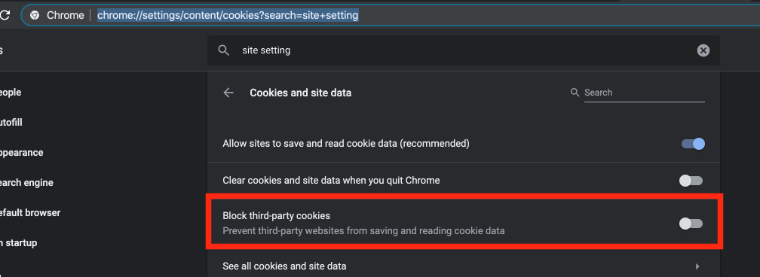
If you click on the Zoom Pro navigation link and can’t see the Zoom integration on Camino, you will need to clear the cache and cookies on your browser.
To fix this on Chrome, go to Site Settings > Cookies and site data > ensure block 3rd party cookies is NOT enabled:
Direct link: chrome://settings/content/cookies?search=site+setting
From there, go back to your Camino page and click on the Zoom integration. Here is a guide for Google Chrome and a guide for Firefox. We do not recommend Safari, Edge, or Internet Explorer for using Camino.
If that does not work, you may want to try a different browser (Chrome or Firefox preferred) or use the Zoom log in on the MySCU Portal.
For more information or assistance, please contact Camino Support (caminosupport@scu.edu or 408-551-3572).