Zoom Guide for Students
Zoom is the web conferencing tool you will use in your classes to attend live lectures and review sessions, to collaborate on group projects, and for virtual office hours with your instructors.
Use Zoom on your desktop or laptop computer (Windows and Mac), or mobile device (iOS and Android) to connect with anyone internal or external to SCU. All SCU students receive Zoom Pro accounts, allowing for sessions without a time limit and up to 300 attendees. Students can use Zoom to create and host their own meetings. Faculty will likely schedule Zoom sessions within Camino for classes, meetings, and office hours with students.
After reviewing the steps and information below, join a test meeting at scu.zoom.us/test. Zoom support is available on campus and through Zoom.
How Can I tell if I am logged with my SCU account?
To ensure you are logged into Zoom with your SCU account, follow these steps:
- Click on your picture in the upper righthand corner of the Zoom application (or webpage).
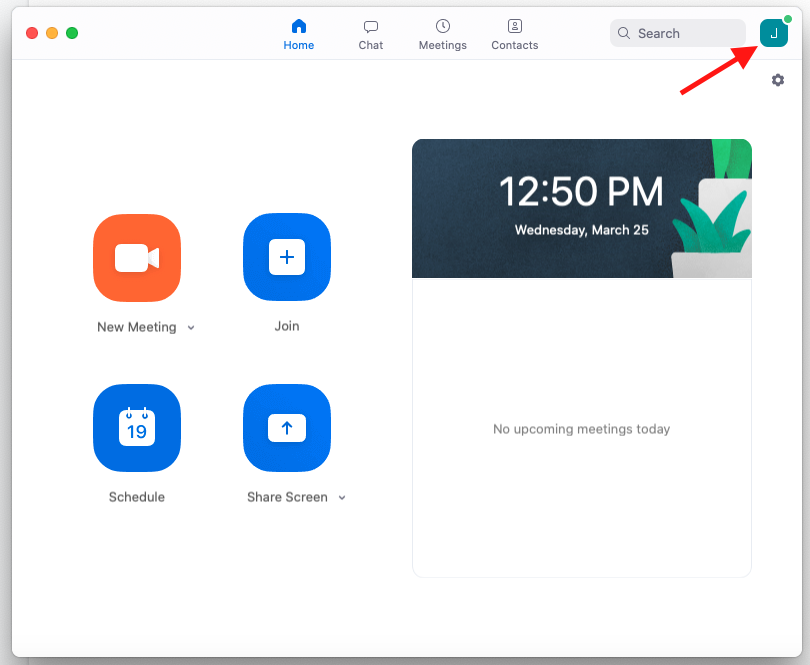
- To the right of your name, it will say “licensed.”
The Zoom Meeting Controls

- Mute/unmute your audio (not the audio of the participants). You can also select your audio input here by clicking the up arrow next to the microphone icon.
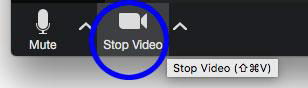
- Start/stop your video. You can also select your video input here by clicking the up arrow next to the video camera icon.
- Invite more people to join by email, IM, or meeting ID
- View a list of participants. To "raise your hand" hover over the participant icon.
- Share your desktop (everything you have open) or select a specific application to share (e.g., Microsoft Word)
- Send a message to one person (using private chat) or to all participants
- Record the meeting (if you have been granted permission)
- Leave or end the video meeting
For more information on how to use the meeting control, please refer to:
Switching between "Share Your Screen" and Video
As a participant you might be asked to share your desktop or an application. During a meeting you can switch back and forth between sharing your screen and sharing your video as often as needed.

If you are in video mode, switch to screen share by clicking “Share Screen” in the menu bar as shown: A window showing all possible options to share displays like below. Click on the item you want to display, which will be highlighted in green, then click “OK”:
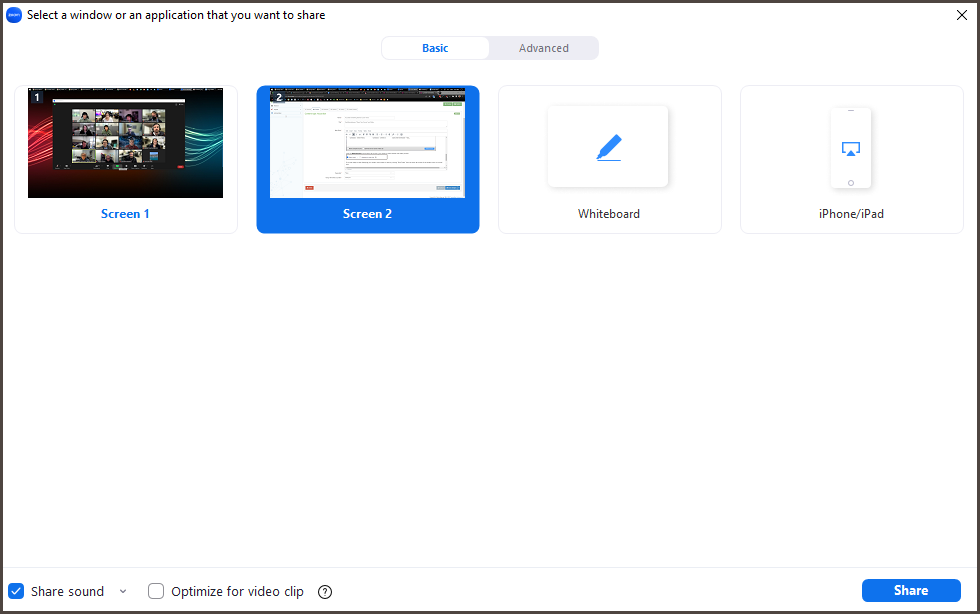
Click the Share Sound at the bottom left corner if you intend to share content with an audio portion:

If you are ready to stop displaying your screen, switch back to video by clicking “Stop Share” from the menu at the top of the screen, shown in the red box:

Managing Audio
If possible use a headset with a microphone. If you don't have a headset, use headphones
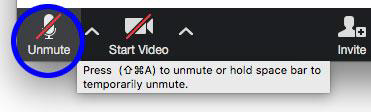
Immediately mute your audio in the ZOOM window when entering the meeting. You may already be muted by the host, so this may not be necessary. Don't forget to unmute yourself if you want to speak.
Managing Video
Uncover your camera privacy screen (if you have one)
Decide if you want your video feed to be on or off and select “Stop Video” if you prefer not to show your video feed. Remember to "Start Video" if you want to turn the camera back on.
Using Zoom Chat
Use it to communicate with the facilitator and other participants.
Messages sent default to “everyone.” To send a private chat, you must choose to do so. Remember, the meeting host, likely your instructor, will see all Zoom  chat content, even private.
Helpful Hints:
- Find a quiet location to join your session, ideally with a fast LAN connection or good quality Wi-Fi signal.
- Log in to every session with your SCU Zoom account.
- Join a session a few minutes early to test your audio and video connections. Ensure you have the latest Zoom app downloaded (Zoom.us menu > Check for updates).
- Enable your camera to help faculty and the class see you and build community.
- Use a headset or earbuds instead of speakers and a microphone. Speakers and a microphone may generate static for others.
- Mute yourself when you're not speaking and become familiar with quickly muting and unmuting yourself to prevent unintentional background noise.
- When video is enabled, try to speak to the camera for better eye contact.
Troubleshooting
- They can’t hear me - You might be muted or having issues with the meeting.
- I can’t hear anyone - Your computer system volume might be low or muted.
- I can't see myself on video in the meeting - Ensure your video camera isn’t covered. Check the video icon at the bottom of the Zoom meeting window. If it’s off, it will read “Start Video” with a red slash. Click the icon to start your video feed. Make sure “show thumbnail video” is selected in the Zoom meeting window.
- I can’t see the shared screen presentation - The meeting host might not have a presentation yet. Check verbally with your host if you are concerned.
- I don’t see anyone in the meeting. Am I in the right meeting? - Check your Zoom session link. Click the “participants” icon to see if other participants have joined. Introduce yourself and ask if anyone is there. You may need to wait.