Class Recording Self Service Tool
We developed a Lecture Capture Self-Service Tool & Recording Manager to assist scheduling and downloading recurring class recordings!
It's a great resource, and we would like to invite you to give it a try next quarter.
Rooms outfitted for classroom capture system >
Rooms outfitted for classroom capture are:
* indicates voice reinforcement is also available.
| Building | Rooms | ||||||
|---|---|---|---|---|---|---|---|
|
Alameda Hall
|
101 | 102 | 103* | 104 | 105 | 108 | |
|
Alumni Science
|
101 | 120* | 220 | 301 | 302 | ||
| Benson Center |
Parlor B*
|
Williman Room* | California Mission Room* | ||||
| Bergin Hall | 116* | 214 | |||||
| Casa Res. Hall | 3 | 7 | 8 | ||||
| Charney Law | 101* | 102* | 103* | 104* | 106* | ||
| 201* | 202* | 205* | 206* | 207* | 210* | 316 | |
| Daly Science | 206* | 207* | |||||
| De Saisset | Main Event Hall | ||||||
| Dowd Art | 108* | 122 | 206 | 208* | 210 | 302 | 304 |
| Graham Res. Hall | 163 | 164 | |||||
| Guadalupe Hall | 130/131/143/144 (counseling rooms) | 147 | 148 | 149 | |||
| 150* | 151* | 152 | 153 | 155 | 201 | 202 | |
| 203* | 204* | 205 | 260 | 301 | 307 | ||
| Heafey Hall | 111 | 112 | 122* | 125* | 129 | 225 | |
| JST (Berkeley) | 216 | 217 | 321 | Chapel (MS tech required) | |||
| Kenna Hall | 102* | 104* | 105 | 107 | 109 | 111* | 212 |
| 214 | 216 | 218 | 304 | 306 | 308 | 310 | |
| Learning Commons | 129 (V&P A)* | 131 (Edit 2) | 132 (Edit 1) | ||||
| 133 (V&P B)* | 203 | 205 | 327 | ||||
| Locatelli | Main Event Hall | ||||||
| Loyola Hall | 136 | ||||||
| Lucas Hall | 106* | 107* | 125 | 126* | 205 | 206* | 207* |
| 208* | 209* | 306* | 307* | 308* | 309* | 310* | |
| Mayer Theatre | 231 | Fess Parker | |||||
| MDF | Recital Hall | 119 | 124 | 125 | |||
| O'Connor Hall | 102* | 103 | 104 | 105 | 106 | 107 | 109 |
| 110 | 201 | 204 | 205 | 206 | 207 | 209 | |
| 210 | 215 | ||||||
| SCDI | 1301* | 1302* | 1308* | 2116 | 2301 | 2302 | 2311J |
| 3110 | 3115* | 3116* | 3301* | 3302* | 3311J | 4010 | |
| Sobrato Res. Hall | 19 | Commons B/C* | |||||
| St. Joseph | Executive Conference Room* | ||||||
| Vari Hall | 102* | 128 | 129 | 133 | 134 | 135 | 232 |
| Varsi Hall | 114 | 222 | 231 | ||||
How to use the Self Service Tool >
- Sign in to SCU Academic Technology Class Recording using your SCU credential
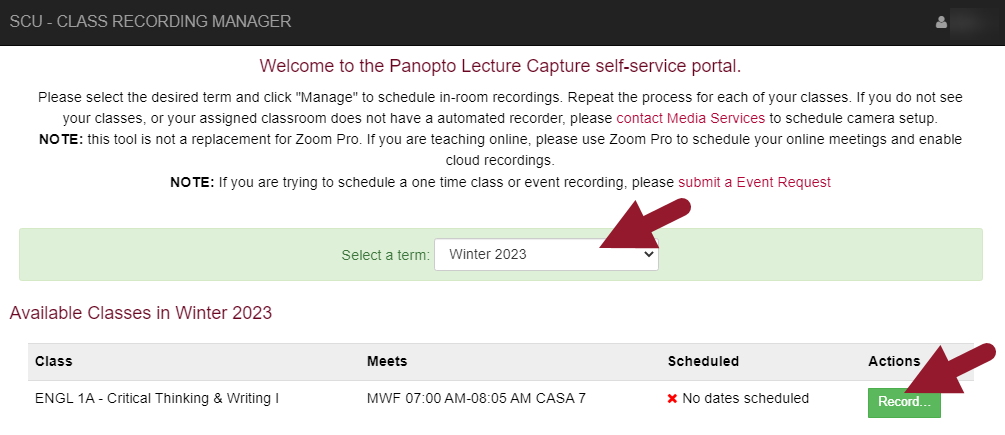
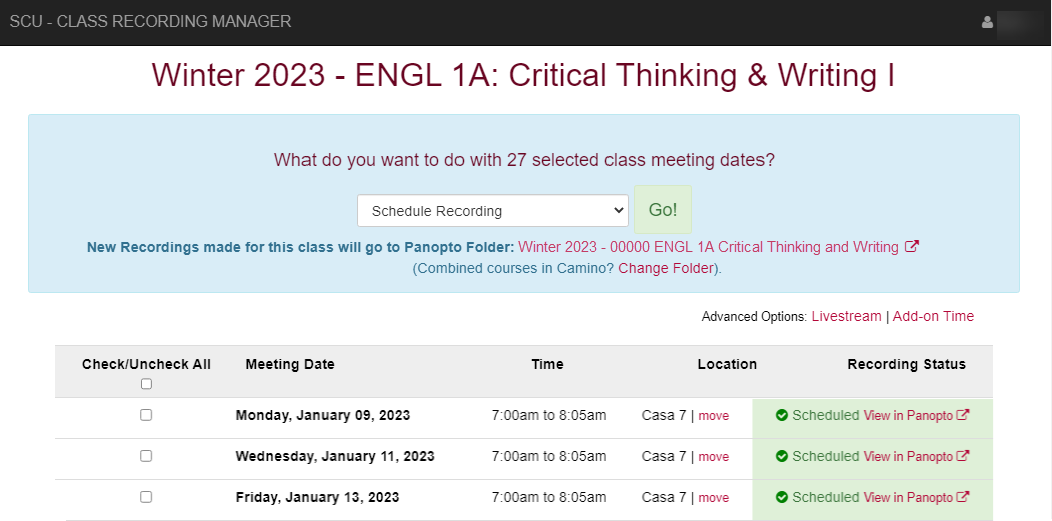
- Select the desired term and click the green Record button to see more details
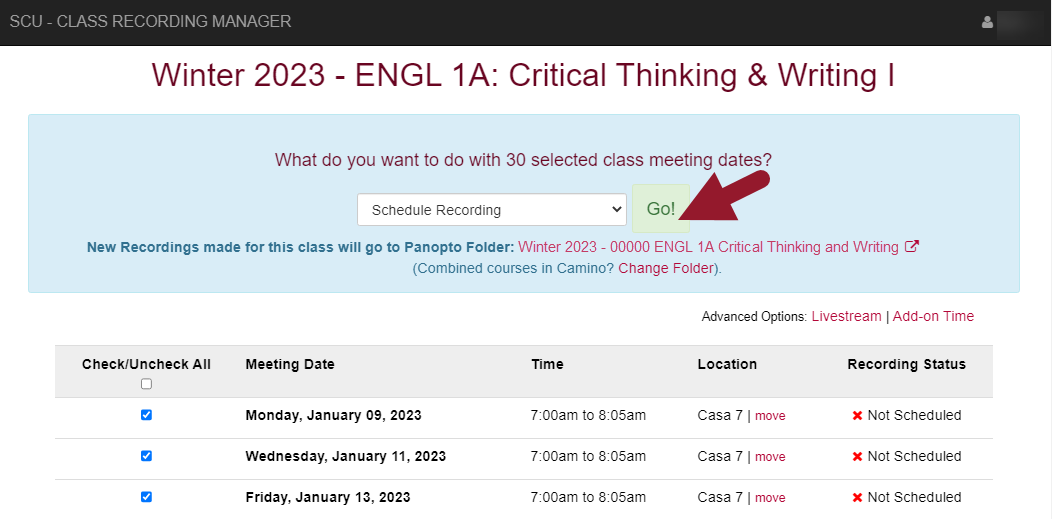
- Check to make sure the class date, time, and classroom location are correct.
(The tool can take up to 24 hours to receive updates if your class is recently moved to another room. If the room information is not correct, check the section "I need to move my classroom.")
- Review the page and uncheck any dates you don't need recording.
- Scroll back to the top of the page, and select Schedule Recording, then click Go
- A pop-up window will appear. Please leave the window open until everything is complete before clicking OK.
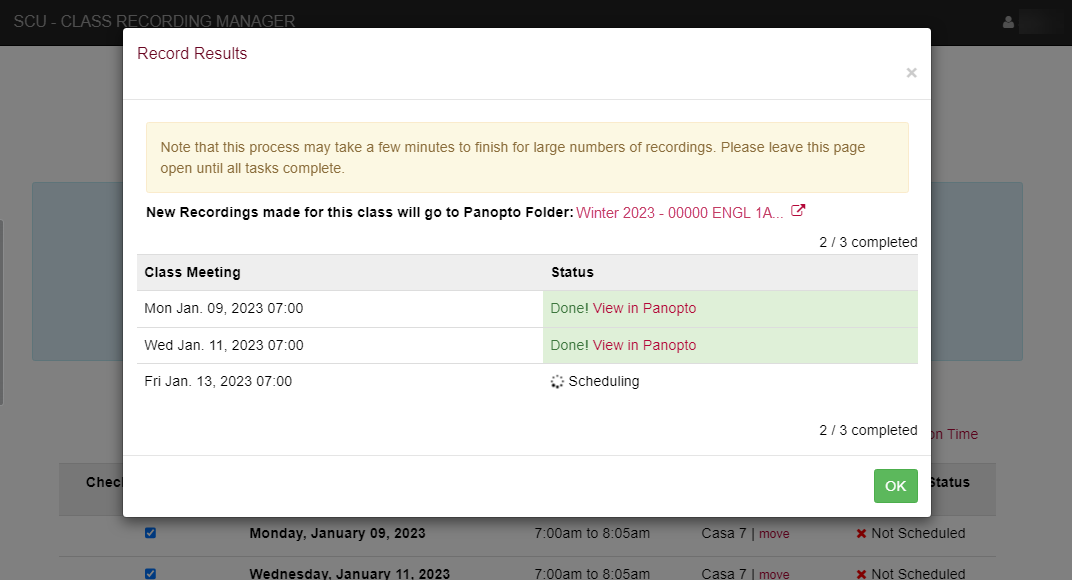
- You are all set!
If you run into issues using this tool, please do not hesitate to contact Media Services.
Change recording folder (course combination)
By default, all recordings go to the course's designated recording folder following each Camino course site.
This instruction walks through how to reschedule recordings if you combined your courses but want recordings from multiple sections to show up in the same recording folder.
- If you don't already know the master course's 5-digit course ID, sign in to your Camino course site, and click Settings > scroll down to locate the SIS ID

- Sign in to https://www.scu.edu/is/academic-technology/class-recording and select the course you want to schedule recordings for.
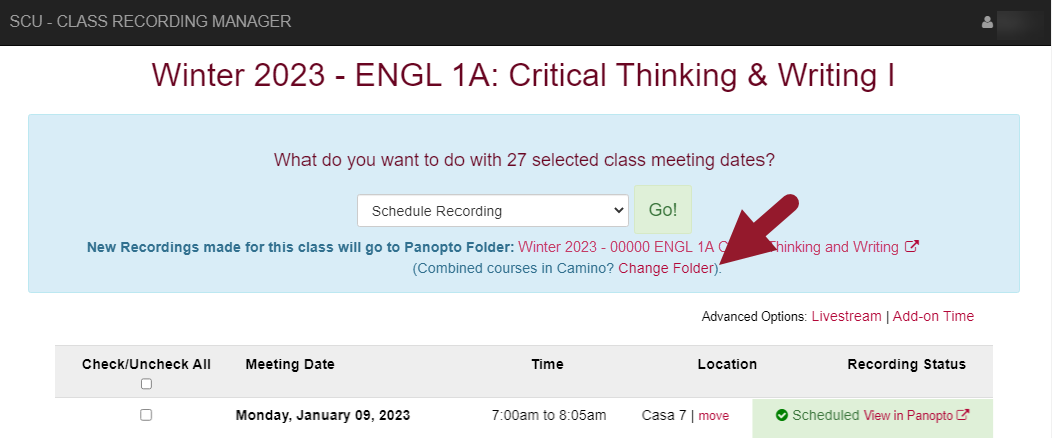
- Click (Combined courses in Camino? Change Folder)
- Type in the 5-digit course number you got from the Camino course site, and click Search
Double check to make sure the course name matches your master class, then click Select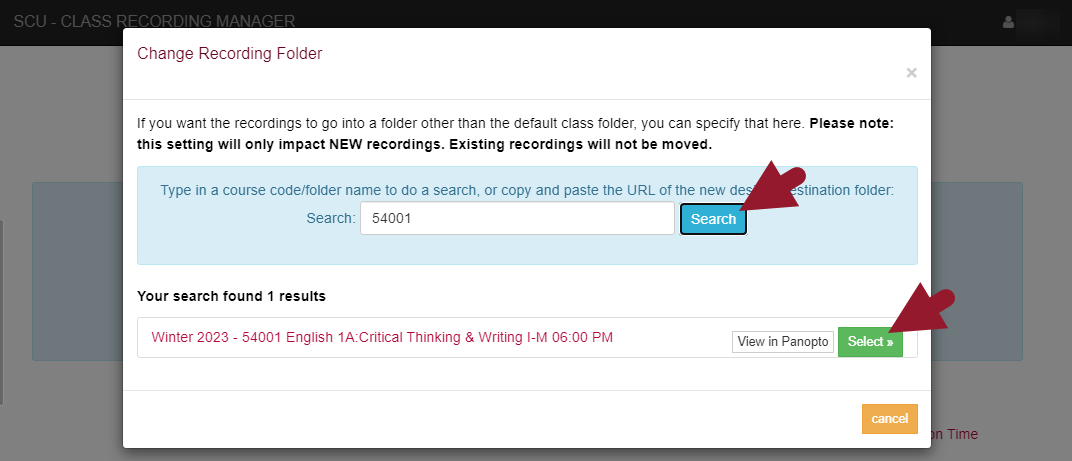
- You can now continue with scheduling recordings knowing that the recordings of this class will show up in the master folder.
Please note that this action will not impact existing recordings. Only new recordings scheduled from now will appear in the new destination.
If you run into issues using this tool, please do not hesitate to contact Media Services.
Change recording location (class moved to another room)
Please note that the self-service tool may take up to 24 hours to update class information, including date, times, and location. There may be times you need to manually tell the system you need to change recording to another location.
This instruction will walk you through how to schedule recording in a different room.
- Sign in to https://www.scu.edu/is/academic-technology/class-recording and select the course you want to schedule recordings for.
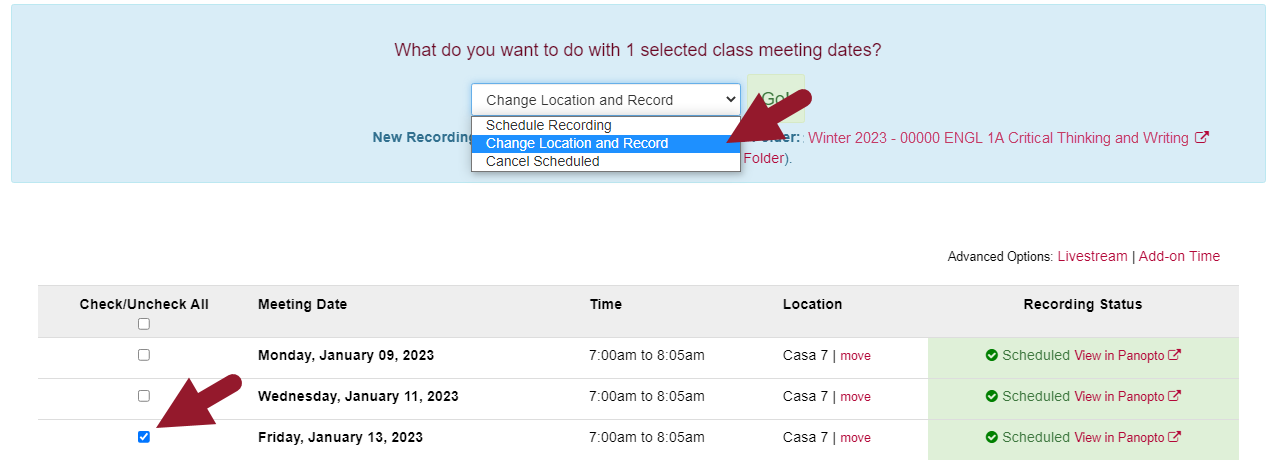
- select the dates you want to change the recording location, then scroll to the top page and select Change Location and Record > GO
- Type in the new classroom information and click Update Location and Record...
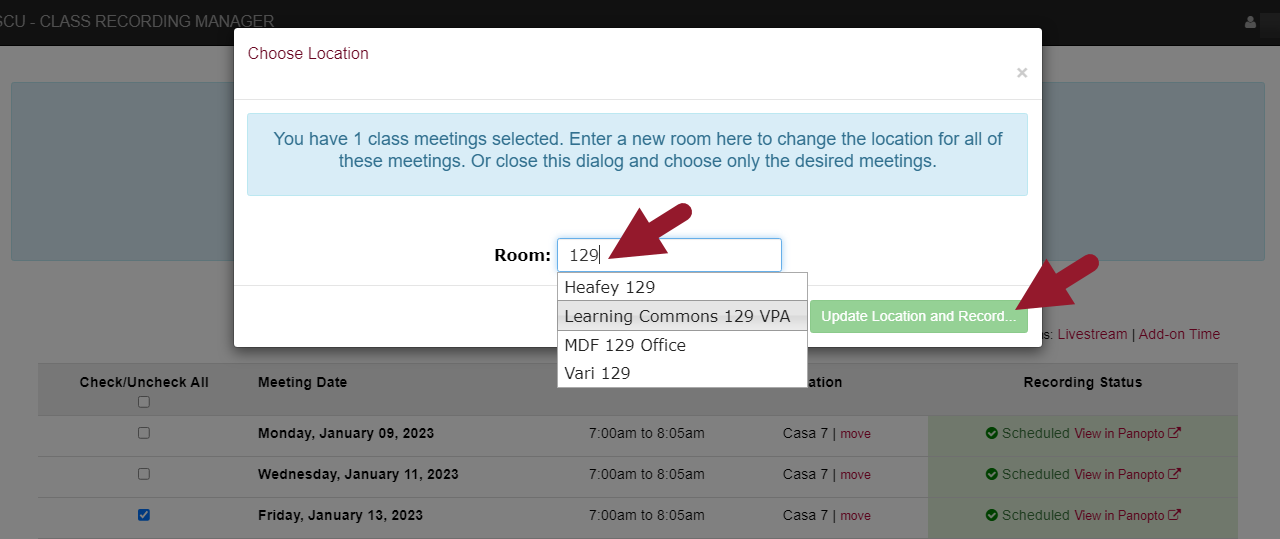
- System will begin rescheduling the recording. Once complete, you will see the recording for the selected date(s) changed to the new room.

Please note that the system will not be able to double check if you scheduled in the correct room. There may also be a chance that there's another session already scheduled in the room. If you run into issues using this tool, please do not hesitate to contact Media Services.
Add additional dates (make up session / final exams)
You can add additional recording dates such as make-up sessions or final exams yourself.
- Sign in to SCU Academic Technology Class Recording and select the course you want to schedule recordings for.
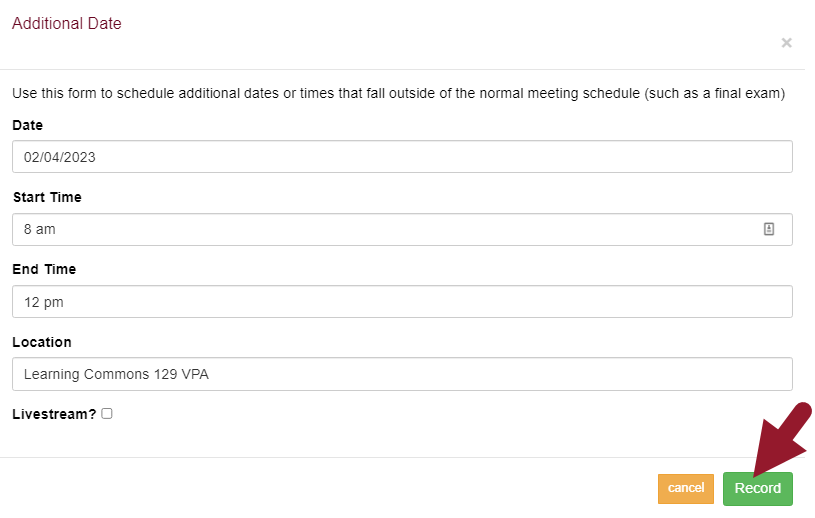
- Scroll all the way to the bottom of the page and click Add additional dates...

- Fill in your class information, including date, start time, end time, and recording location (please make sure the recording location has a built-in recorder. You will not find the room information if the room does not have a built-in recorder). Click Record to start the process.
- You will see a confirmation when the scheduling is complete. Depending on the date and time, you may run into a scheduling conflict. Check with Media Services to resolve any scheduling issues.
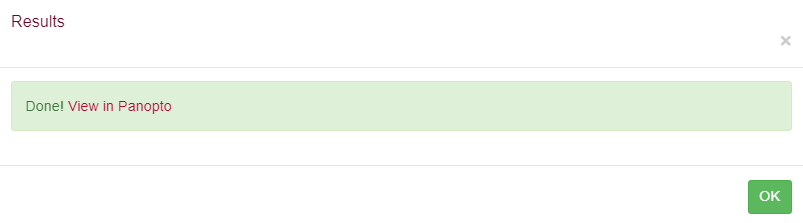
- After the page refreshes, you will now see the added date at the bottom of the page.

If you run into issues using this tool or getting scheduling errors, please do not hesitate to contact Media Services.
Regular Recording v.s. Livestream
Within the self-service tool, you have the ability to schedule Livestream events instead of regular recording.
The difference between the two recordings is as follows:
| Regular Recording | Livestream |
|---|---|
| Scheduled recording entry is not visible to the viewers | Scheduled recording is visible to the viewers. People with access to this page can share it with other people ahead of time. |
| Recording is not available until the event is complete and the recorded footage is processed. | Recording is live-broadcasted as it is happening, with about a 15-30 second delay. |
| Recording is available to viewers on demand. | Recording is available to viewers on demand (same URL as the livestream URL). |
To schedule recording as Livestream:
- Sign in to https://www.scu.edu/is/academic-technology/class-recording and select the course you want to schedule recordings for.
- Click Advanced Options: Livestream to reveal the options.

- Check the Recording box as well as the Livestream box on the desired date(s). Scroll back up to the top of the page and click Schedule.

- You will see confirmation of the date(s) shown as Scheduled* (with asterisk).
