Set Video Approval Process
1. Turning on Session Approval for a Specific Folder >
1. Open the desired folder, and select the gear icon from the upper right corner to open the Settings menu (Fig. 1).

Figure 1
1. 2. In the folder's Settings window, select the Settings tab in the left-hand navigation (Fig. 2).
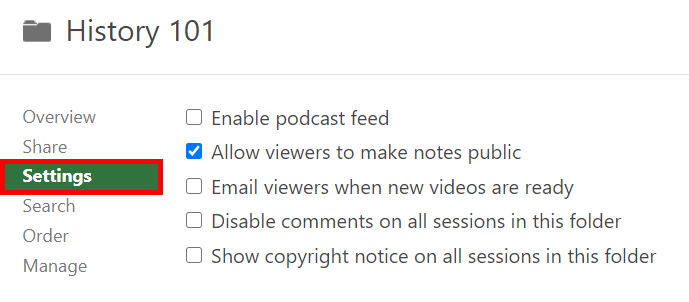
Figure 2
1. 3. Scroll down to the Availability section. Underneath Sessions become available, select the radio button labeled When approved by a publisher (Fig. 3). Note: Once this is selected, all existing videos in the folder and any new videos added will be marked as waiting for approval. These videos will not be visible to viewers until approved by the Publisher.
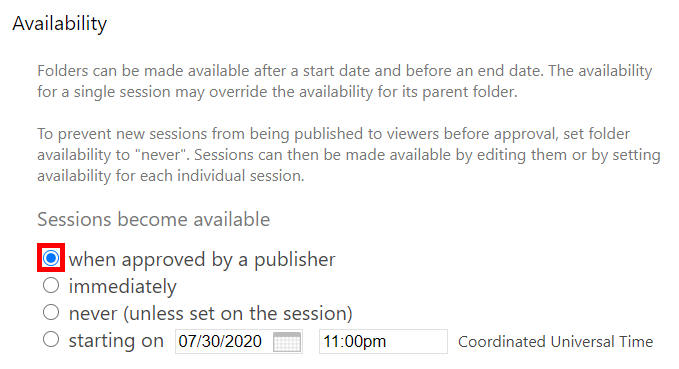
Figure 3
1. 4. After a user is given Publisher permission, they will receive an email notification any time a new video is added to the folder and will be asked to approve or reject it. A folder may have multiple publishers (Fig. 4). Note: All publishers listed on the folder will receive an email notification when a new video is submitted for approval, but only one publisher needs to approve the content to make it available.
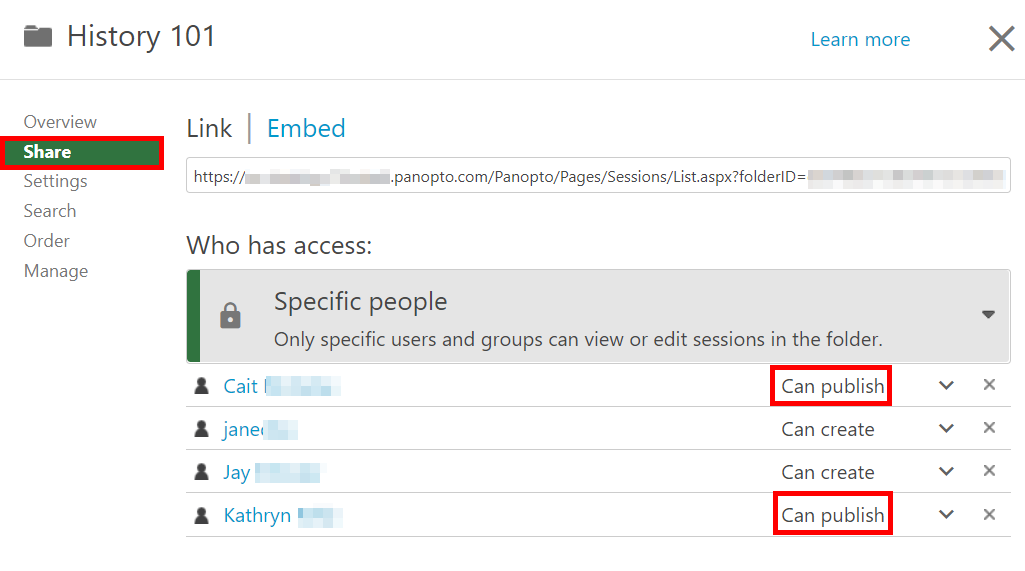
Figure 4
2. Approving or Rejecting Videos >
2. 1. The Publisher(s) will receive an email when a video is uploaded to the folder (Fig. 5). It will include two links: the first opens the video in the Viewer so you can preview the video. You will notice that the link includes the text Panopto/Pages/Viewer.aspx. The second link opens the submitted video's Settings menu. You will notice that the link includes the text Pages/Sessions/List.aspx. Note: For this example, the submitted video is titled History of the Panama Canal.
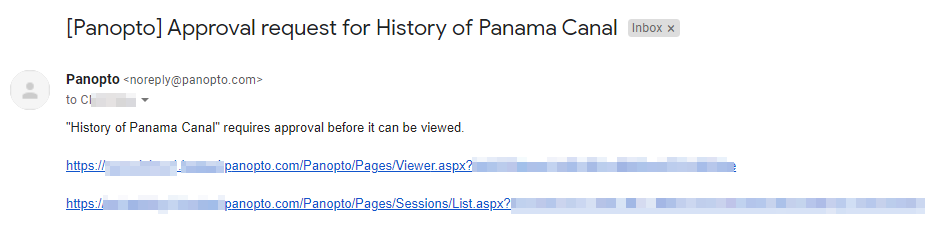
Figure 5
2. 2. There are two ways to access the Approval options.
2.2.a. From the email: Select the second link mentioned in 2.1., which includes the text Pages/Sessions/List.aspx, to open the video's Settings menu to the Overview tab (Fig. 6).
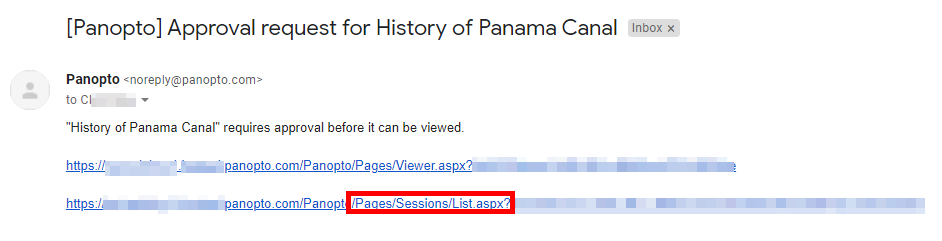
Figure 6
2.2.b. From inside the folder: Hover over the video, which will appear with the phrase Waiting for approval on it, and select the Settings button to open the video's Settings menu to the Overview tab (Fig. 7).
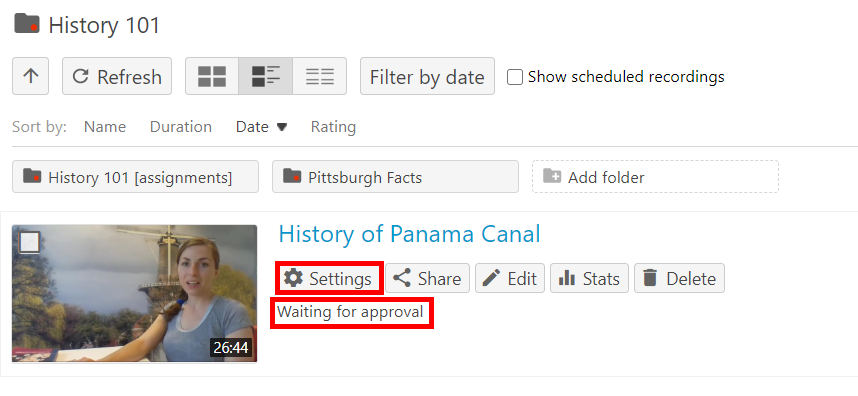
Figure 7
2. 3. On the Overview tab of the Settings menu, you will see Approval listed underneath the Session Information section. Select Approve if you approve the submission, or Reject if you need to reject the submission. (Fig. 8).
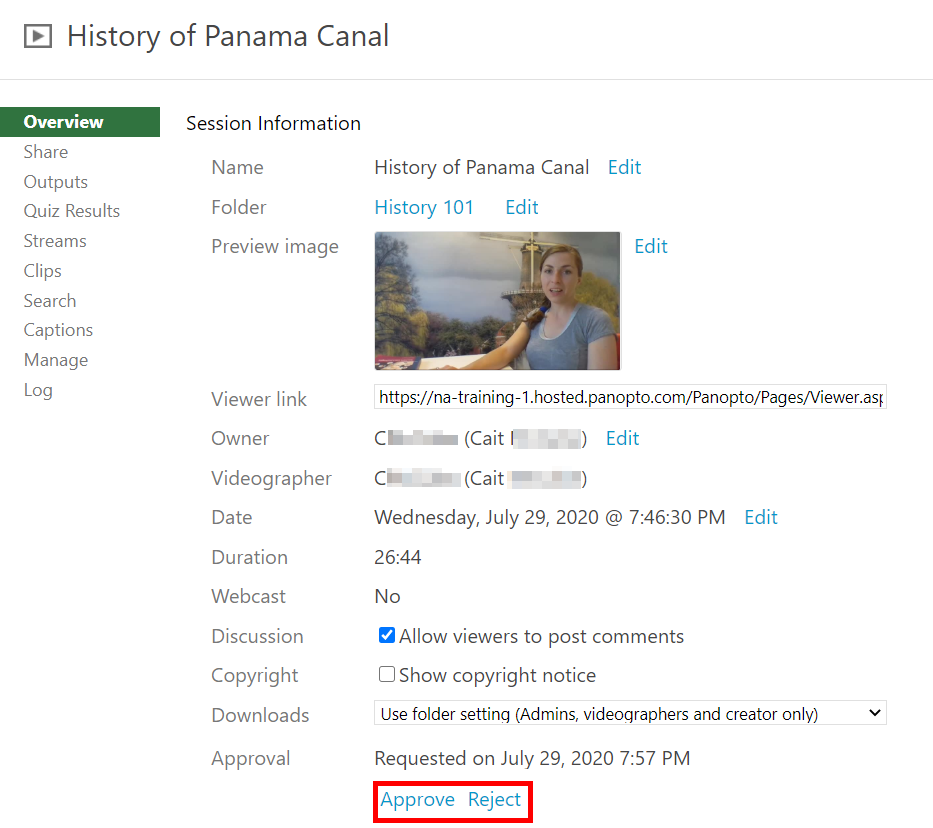
Figure 8
2.4. If you accidentally select Approve, you can select the Reject link that will appear underneath the approved date and time stamp (Fig. 9)

Figure 9
2.4.a. If you decide to reject the session, hit the Reject button and provide a reason for rejecting the video. The video Creator will receive an e-mail notification that includes the reason provided for its rejection (Fig. 10). Note: this email will include links for them to resubmit a video or edit the submitted video, depending on the rejection feedback provided.
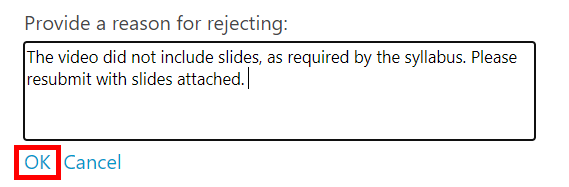
Figure 10
2. 5. After its approval, the video will no longer show Waiting for approval (Fig. 14). The session is now visible to all viewers.
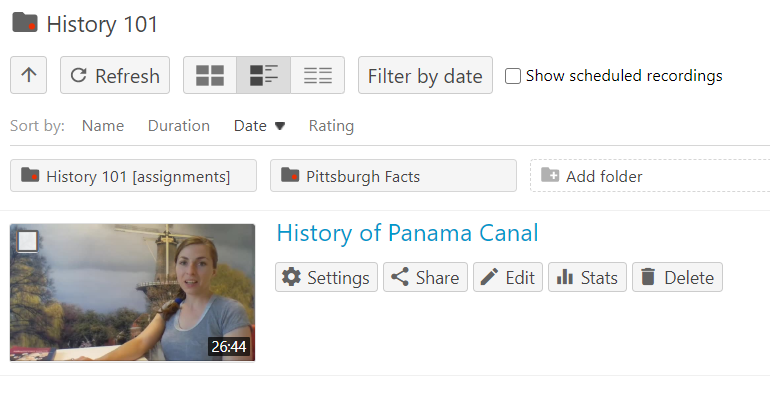
Figure 14