PrinterLogic
PrinterLogic is a web application which manages our networked printers. The system will allow you to install a department printer by choosing it from a list, including the installation of the printer driver, for both Windows and macOS. This system is separate from SmartPrint (student printing) and the copiers (Papercut) on campus.
The PrinterLogic system does Not support wireless printing.
Last Update - 10/3/2023
PrinterLogic Install Instructions - Windows
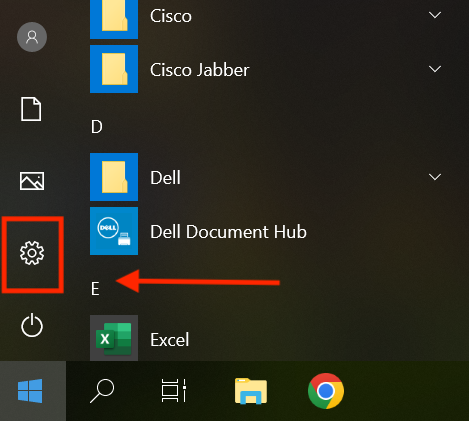
1. If you have an old copy of PrinterLogic installed, it will need to be removed first. Click on the Windows Start button and click the Gear icon.
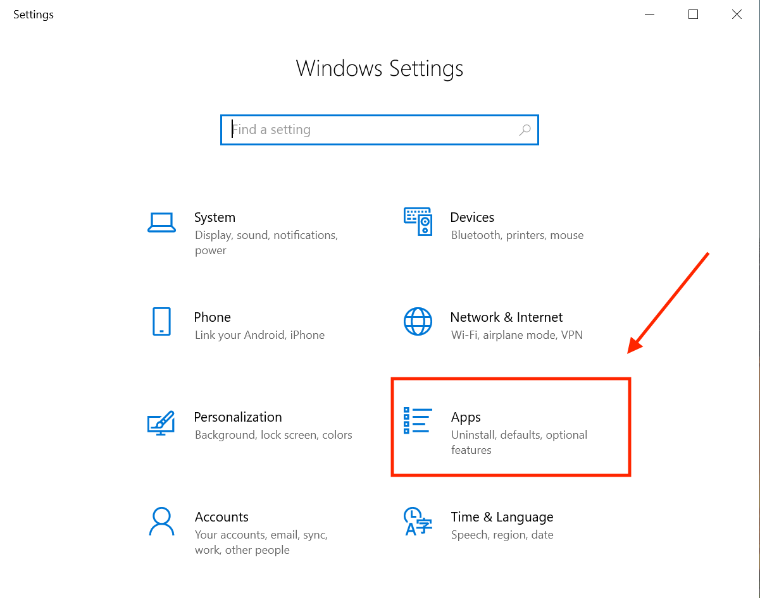
2. Click on Apps.
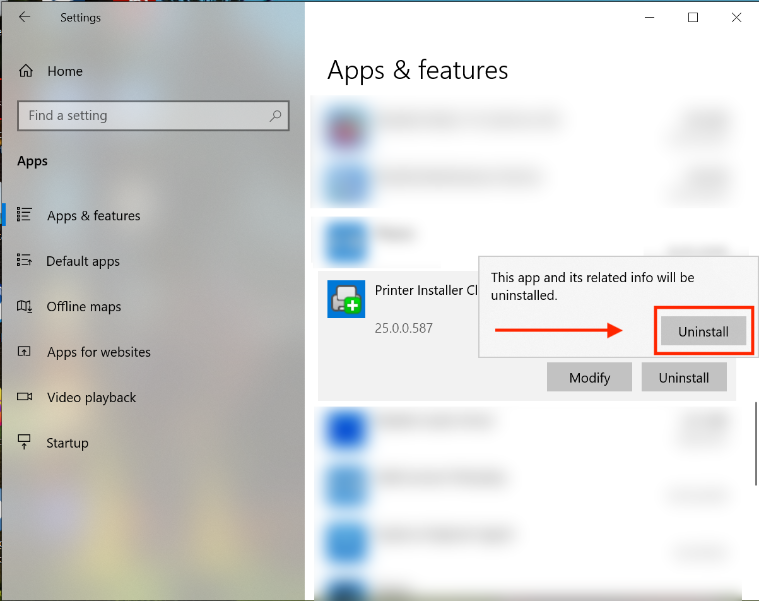
3. Under "Apps & Features", scroll down to see if there's a Printer Installer Client listed.
A. If you see Printer Installer Client listed, click it so it's highlighted, then click Uninstall. Follow the prompts to uninstall the old Printer Logic (Printer Installer Client).
B. If the Printer Installer Client is Not listed, continue to the next step.
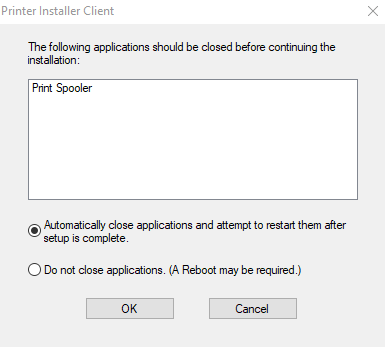
During the uninstall, you may get a warning that the "Print Spooler" is still running and needs to be stopped before the uninstall can continue. Leave the default "Automatically close applications..." selected and click OK.
4. Download the Printer Installer Client (you will need to login to your SCU ID in order to download the client).
5. Once the file is downloaded, unzip it by right-clicking on it and choose Extract All…. Select a location and click Extract.
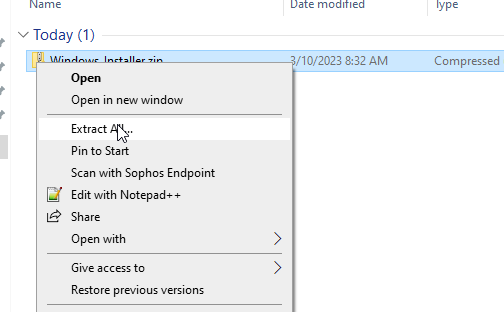
6. Open the “Windows Installer” folder.
7. Right click on the PrinterInstallerClient-Windows.bat file and choose Run as administrator.

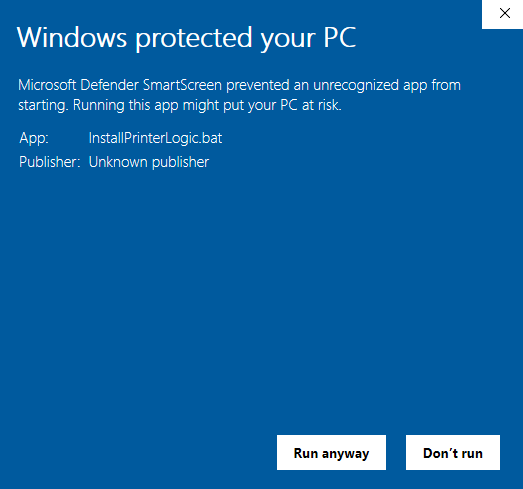
8. If you receive a popup from Windows saying “Windows protected your PC”, click on the More info link, then choose the Run anyway button.
9. Click on the shield icon if it appears on the task bar, and approve the installation of the Printer Logic client.
10. A command-line window will appear while the client is being installed. Installation is complete when the command-line window closes automatically.
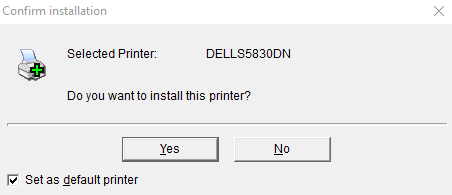
11. To setup a printer, go to https://www.scu.edu/login , sign in, and open the PrinterLogic tile. Once the web page opens, select your building on the left side, then find your department and the printer to install. When you click on the printer, you’ll be prompted to install it.
Manual Uninstall Instructions - macOS
1. If you have an old copy of PrinterLogic installed, it will need to be removed first. You can check to see if an old copy of PrinterLogic is installed by checking the right-side of the macOS menu bar at the top. If you see a printer icon, you have an old copy of the PrinterLogic client installed.

A. To remove the old copy, download the PrinterLogic Install program (you will need to sign in with your SCU ID). Choose a place to save the file, then double-click it to unzip the file once it's downloaded.
B. Right-click the uninstaller PKG file and select Open. Select Open again to run the uninstaller.
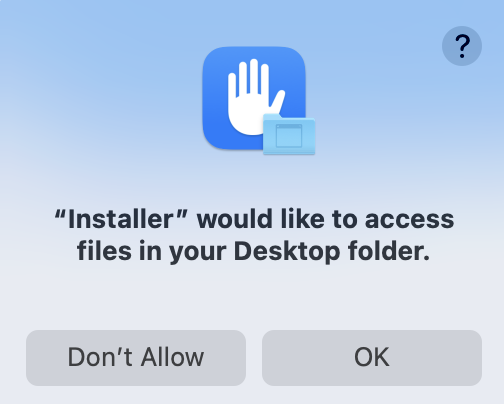
C. Once the uninstaller is running, click on Continue and Install. If you receive a "'Installer' would like to access files in your Desktop folder.", click OK. Once you see the "Installation was successful" message, the printer icon should be gone from the upper right-side of the macOS menu bar / notification area.
6. Click Close.
7. Click Move to Trash.
Manual Install Instructions - macOS
1. Download the PrinterLogic Client installer.
2. Navigate to the location where you saved the PrinterInstallerClient.pkg and double-click it to start.
3. Click Continue
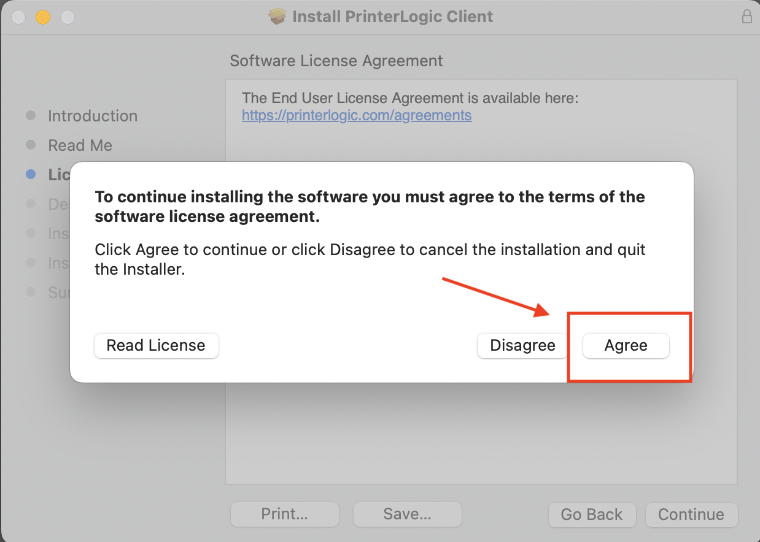
4. Click Continue, Continue again, then Agree. (Please note - if using Safari, you may need to restart Safari after the install is complete in order to enable the PrinterLogic extension (Safari > Preferences > Extensions.)
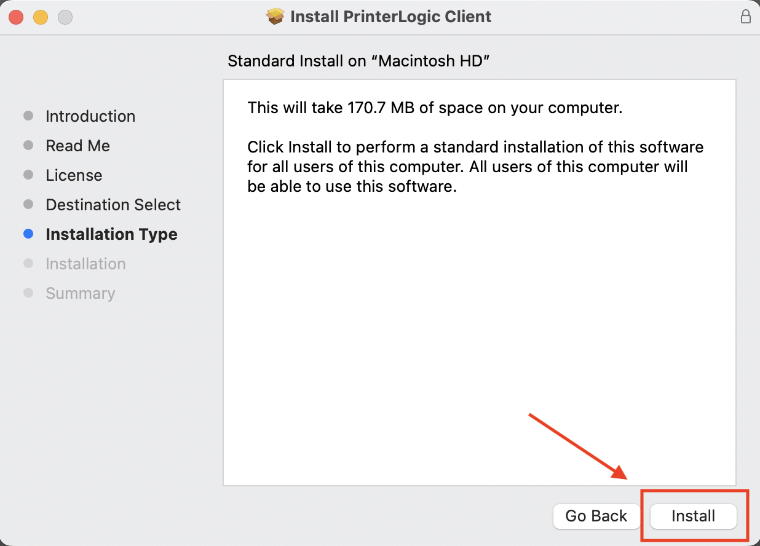
5. Click on Install.
6. Enter in your username and password when prompted to allow the install.
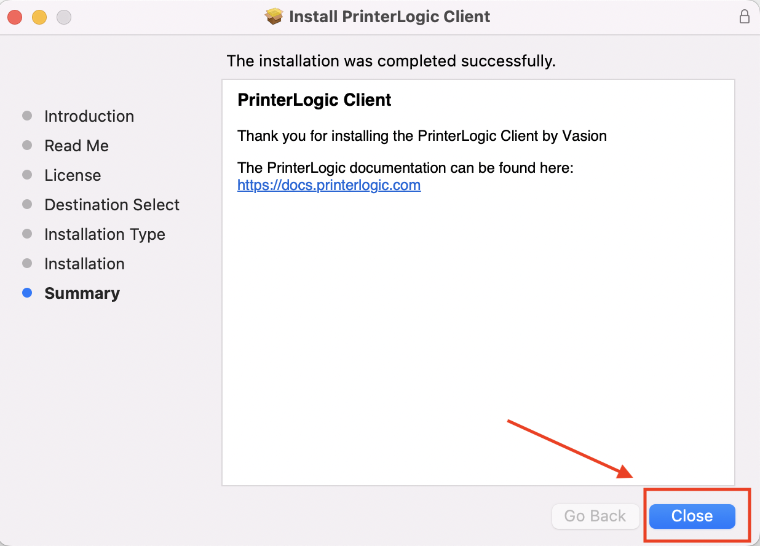
7. Click Close when the install is complete.
8. Click Move to trash when prompted to delete the installer.
Setting Up a Printer
1. To setup a printer, go to https://www.scu.edu/login , sign in, and open the PrinterLogic tile.
2. Now, select your building on the left side, then find your department and the printer to install. When you click on the printer, you’ll be prompted to install it.