Using SmartPrint with Windows and macOS
Using SmartPrint with Windows
The newest version of SmartPrint has only two print queues that need to be set up on your computer: B&W and Color. Simply send your print job to one of these print queues and release your print job at any on-campus SmartPrint printer of appropriate type (B&W or Color) by tapping your ACCESS Card regardless of its location.
- Download the SmartPrint Windows installer (Windows Software link) and run it.
(Note that you may receive a security warning if you’re using Internet Explorer. If you do, click on the Actions button and then click on the down arrow next to More Options. From that list, choose Run anyway. If you receive a Sophos warning, click on Allow this file.)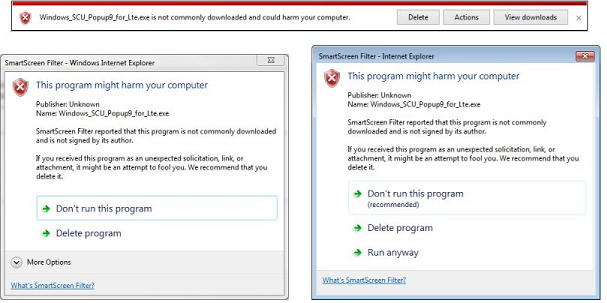
- Click on the Install button. Once the SmartPrint software is installed, click on the Finish button.
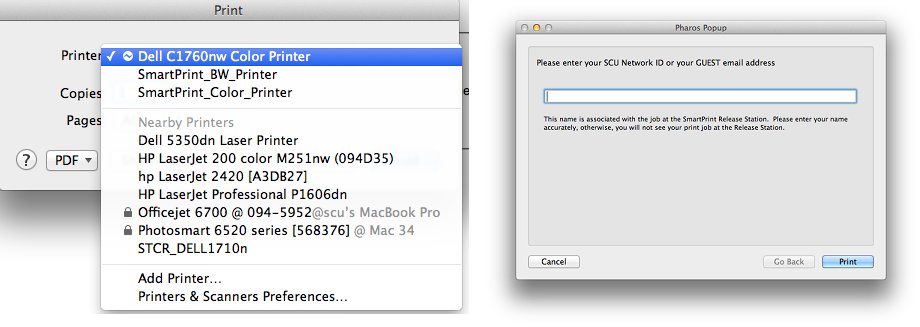
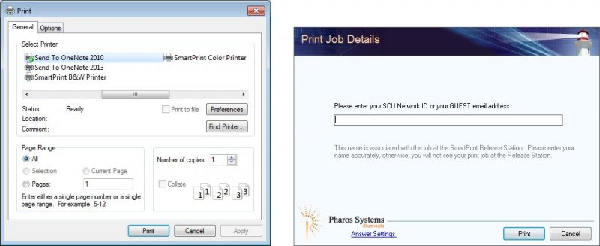
- To print to a SmartPrint printer, print your document as usual. In the printer selection box, choose either the SmartPrint BW Printer (for black-and-white print jobs) or the SmartPrint Color Printer (for color print jobs).
- In the Print Job Details screen, enter in your Santa Clara University Username (the one you use to access Gmail, Camino, etc.) (e.g. JSmith) and click Print.
- Go to any SmartPrint printer on campus and tap your ACCESS card on the Bb reader. You will see any print jobs associated with your username. Select the job you want to print and press the Print button on the release station screen.
Using SmartPrint with macOS
The newest version of SmartPrint has only two print queues that need to be set up on your computer: B&W and Color. Simply send your print job to one of these print queues and release your print job at any on-campus SmartPrint printer of appropriate type (B&W or Color) by tapping your ACCESS Card regardless of its location.
- Download the SmartPrint MAC installer (macOS Software link) and save the file to the desktop (drag it from the Downloads folder if needed.)
- Double-click on the SCU_Popup9.dmg file to open it.
- Double-click and install the Popup.pkg.
(You may receive a security warning from macOS when attempting to install the driver packages. If so, go to System Preferences, Security & Privacy and click the lock icon. Enter in your Mac password. Click on Open Anyway for each package when prompted. Double-click on the driver package again to install.)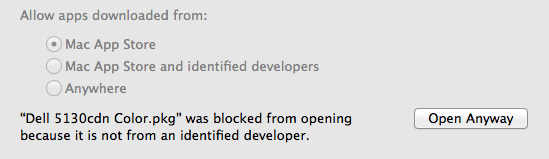
- To print to a SmartPrint printer, print your document as usual. In the printer selection box, choose either the SmartPrint BW Printer (for black-and-white print jobs) or the SmartPrint Color Printer (for color print jobs).
- In the Print Job Details screen, enter in your Santa Clara University Username (the one you use to access Gmail, Camino,etc.) (e.g. JSmith) and click Print.
- Go to any SmartPrint printer on campus and tap your ACCESS card on the Bb reader. You will see any print jobs associated with your username. Select the job you want to print and press the Print button on the release station screen.